Hello Hello, You know, it was not until more recently that I discovered the Waverly quarter patterns that are only for 97 cents at Wal-Mart. Truly, I think with a lot of ideas can come… More
Make It Yours, Make It Work
Hello Hello, You know, it was not until more recently that I discovered the Waverly quarter patterns that are only for 97 cents at Wal-Mart. Truly, I think with a lot of ideas can come… More
Hi Everybody: Happy President’s Day! I am finally back with a new craft idea. I love bows as I think that they quite darling so I figured it would be cute to turn an unwanted… More
Hiiii! Backstory: So, today’s craft was actually one that I came up with in an effort to be published in this popular craft magazine for their Spring edition. I know it’s not Spring here nor… More
Good February to you guys,
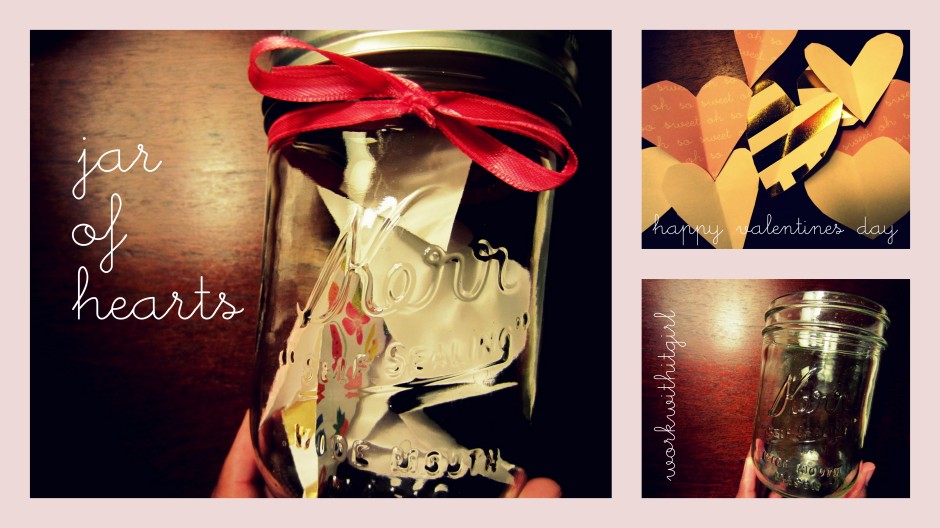
I am kicking off this month with a craft that I created years ago for a women’s community group “party” that was around Valentines Day’s: Jar Of Hearts. I shared this craft on an older blog that I had quite some time ago but I am glad to be brining it back to this one. If you want to give a craft that is thoughtful, sweet and affordable at the same time, just keep on reading:
What you’ll need:
Mason Jars
Scrapbook Paper/Copy Paper/Construction Paper ( Whatever you have)
Ribbons or other decorative material for your jar
Scissors
How it’s done:
Step 1) Take your paper and cut several hearts out of it. It can be small hearts, big ones, many or not of hearts; you can do what you please.

Step 2) Write down messages on each heart. This can be things that you love about someone, that you love that they did for you or kind thoughts in general such as bible verses of encouragement and love.
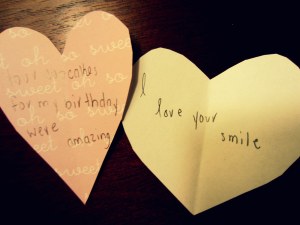
Step 3) Fold your hearts in half and place into your jar. Tie your ribbon around your jar and you are done:


It’s sweet, it’s simple and something which we all could create with the materials that we already have. From me to you, Happy Valentines Day! You are loved by Christ, first and foremost.
WorkWithIt, Girl: If you don’t have it, then you have to question whether or not you were meant to have it. And if you truly believe that you are, then you are going to do what you can to ” make” it.
Hello Hello!
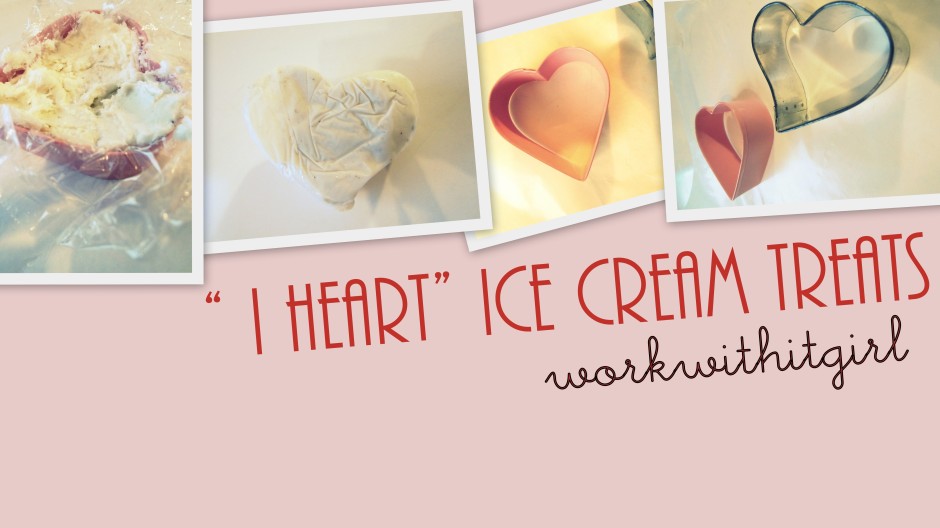
The craft that I am going to share with you was inspired by my own line of work being a doughnut designer. Let me explain; we used to make these Yum-Nut ( Doughnut Ice Cream sandwiches) by putting ice cream in these metal rings that would form thick circles after we stuffed it with ice cream. So, as I looked as these cookie cutters, I was curious as to whether I could do the same thing with what I have to create ice cream treats…and here’s how it came out.
What I Used:
Cookie Cutters ( 2 Heart shaped)
Vanilla Bean Ice cream ( You can use whatever you have)
Sprinkles ( You can use chocolate, gauche, etc)
All I Did:
I took some cookie cutters and lined them , imperfectly, with saran wrap. The saran wrap did not need to be perfect because it was mainly there to help get the shapes out.


I scooped a generous amount of ice cream into each cookie cutter and pressed down with the back of my spoon. It was important to press down to make sure that the ice cream went all the way down through the cookie cutter.


I wrapped the tops casually with saran wrap and popped them into the freezer until as solid as I could wait for ( this is the done) : D
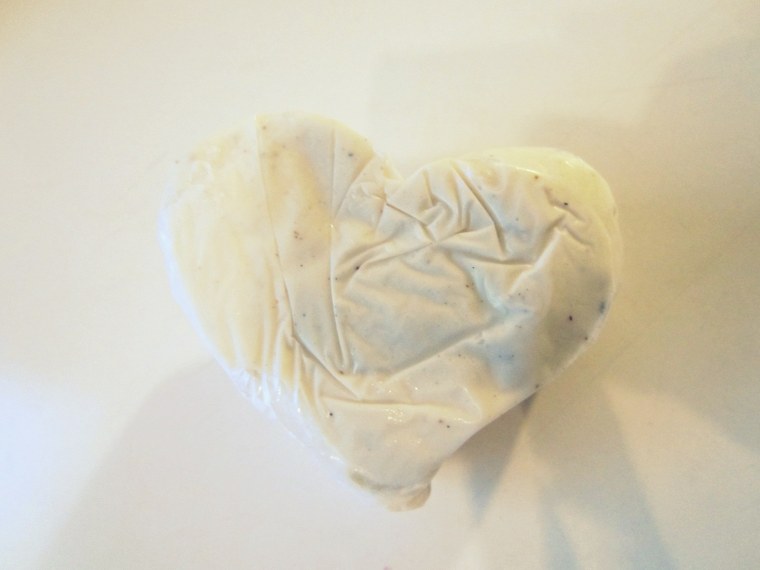
I sprinkled each heart pink/red sprinkles and wala. Okay okay okay, so the heart shaped could be more defined but we can’t take back time can we ? I will make sure I press down more; especially around the center crease but it did not turn out bad!
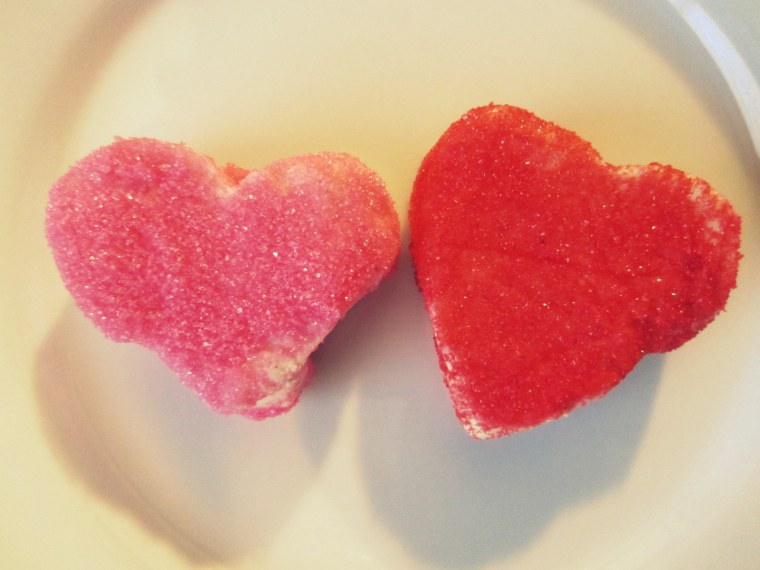
It is nothing complicated but has everything it needs; who wouldn’t want a thick bite of ice cream. I figured this would make a cute treat at a little party ( providing they are in the freezer until served) or just a nice snack for Valentines Day after dinner itself. Is it just me….what do you think ?
WorkWithIt, Girl: Make It Yours, Make It Work.
Hey Everybody!
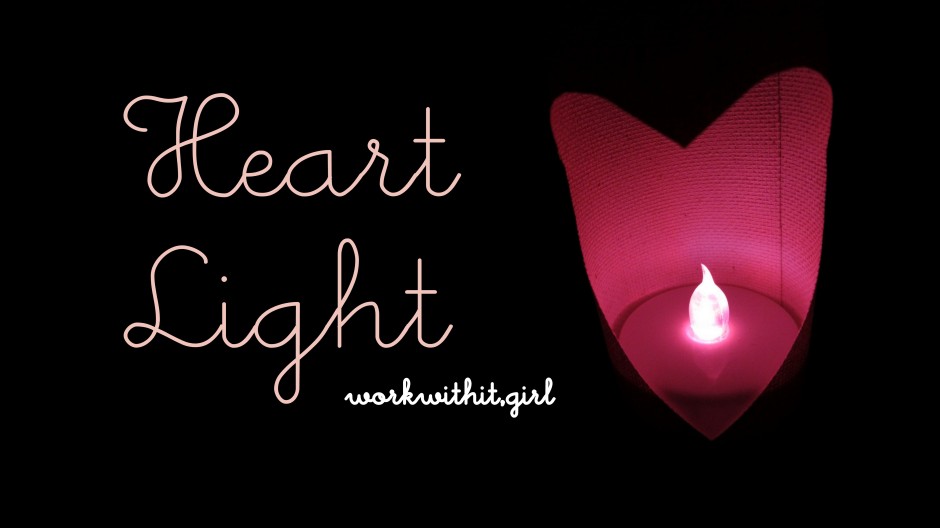
I have been in the process of moving recently and with all the struggles, I just had not had the mindset to create so I am glad that I did this post ahead of time for sure. That being said, I hope to have to awesome and increasingly engaging content coming out soon. Now for this post, I don’t believe this craft was meant to be this and now that I think about, it wasn’t suppose to; it was actually suppose to be a Heart Coin Purse. After a bad cutting job * ha*, it ended up being this heart light. You really could make this with regular paper ( just cut the paper in half) but if you have an extra canvas board…okay maybe this is not a practical craft but hey, here’s how you can workwith a few pieces of canvas fabric.
What I Used:
1 LED Light ( I just love these)
1 Canvas Fabric ( Or Paper)
Scissors/Tape
What I did:
First I took the fabric off of my canvas and made cut it in half. It should have been equal in size but they certainly weren’t. Make sure you cut it evenly…unlike myself.


Fold the fabric in half ( each piece) and cut out a heart

Wrap your heart around your LED and tape the back and you are done!


Uh, this was so easy ( and maybe impractical) that this wasn’t really a how to, just a can do sort of post. Anyhow, I hope that you all have a wonderful Valentines Day, know that are loved by Christ first and foremost.
~ WorkWithIt, Girl: Make It Yours, Make It Work.
Hi Everyone!
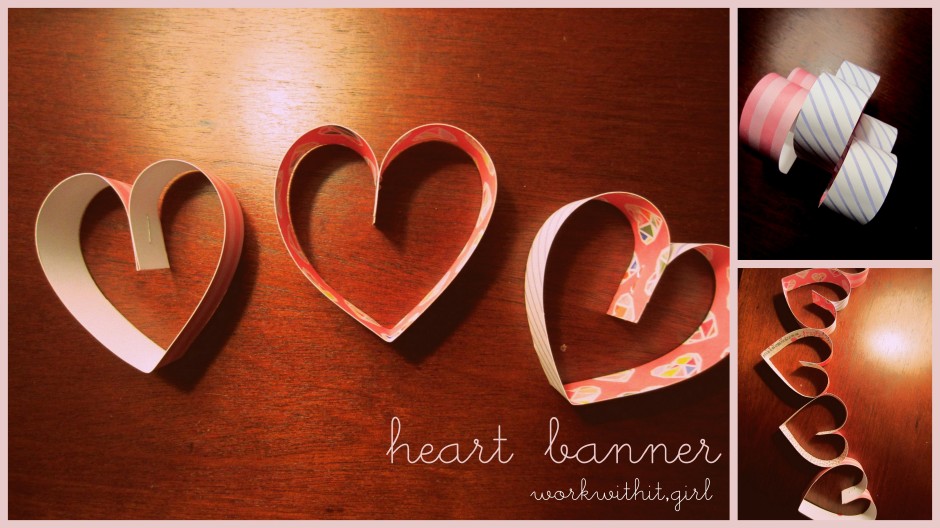
With Valentines Day right around the corner, I wanted to create at least one decorative piece that you can do to dress up your locker, your room, your office desk or even a little Valentines get-together. So, using some scrapbook paper strips that I had just purposeless in my craft bag, I decided to workwith them to make this super simple heart banner. Here’s how its done:
What you’ll need:
Scrapbook Paper
Stapler
How to create the banner:
Step 1) Take your scrapbook paper and using a ruler, cut strips all down the paper. ( vertically or horizontally). How many strips you cut depends on how long you want your banner to be.


Step 2) Take one strip, fold it in half ( V shaped) and then fold in each side creating a heart. Staple the center and keep on going.


Step 3) You can now staple your hearts in a straight line or create a curve ( so that it’ll have a downward center vs. straight).


And you are done:


Maybe you have already seen this before but I haven’t so I figured I’d share it here. Hope you guys like it. Happy Early Valentines Day!
WorkWithit, Girl ~
Good Monday to you!
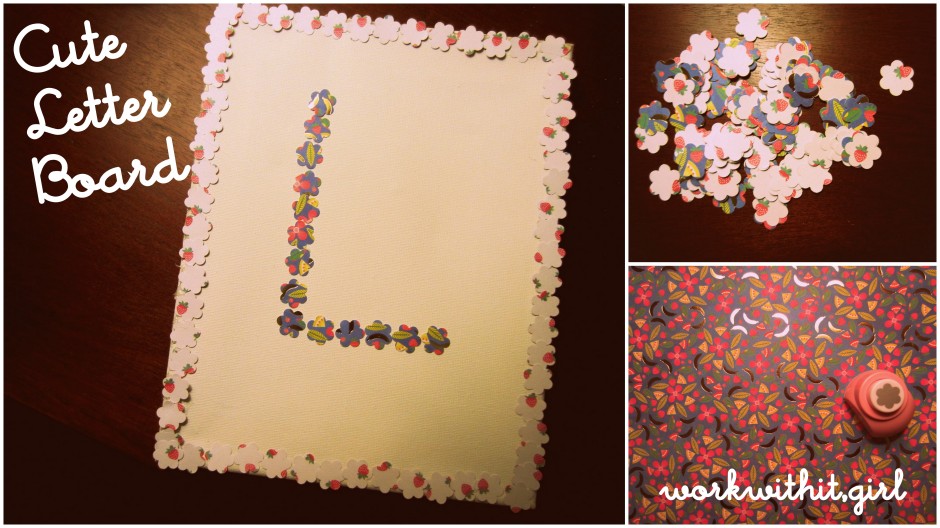
Today I wanted to share with you how to make this simple flower puncher letter board to hang up in your children’s room. It was great to finally use the last canvas from my birthday back in 2016 ( seriously, I got a pack from Michael’s and I never used all 10 until now) to make this and it’s so simple to do! Here’s how you can make it:
You’ll need:
1 Canvas Board
A Hole Puncher ( I got this mini Flower one from JoAnn’s Crafts for 2.00) but you can use any kind of hole puncher you can get your hand on)
Scrapbook Paper of Choice
Glue
Let’s get started:
Step 1) Take your hole puncher and punch as many flowers or whatever design you are using through your scrapbook paper. My paper was double sided so I was able to take advantage of the different designs.


Step 2) Glue your punch-outs onto the sides of your canvas and also the entire perimeter of your canvas.


Step 3) Glue the letter of your choice using the leftover punch outs. This is optional as you could also glue wooden letters, use paint to decorate the middle or whatever you’d like. You are done:


Thank you for joining me for today’s post. Have a wonderful rest of the week!
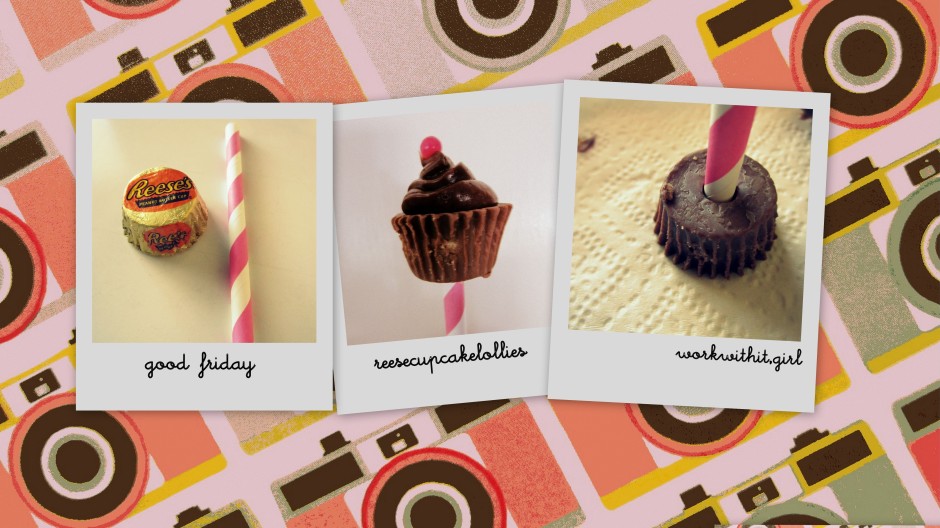
Good Friday to you! Can you believe it is Friday, already ? I kind of feel like I was just saying ” Happy Friday”, anyhow, Blessed Friday to you.
Today I wanted to share with you an old idea that shows that when one door closes, another one can certainly open. I had initially intended to share a DIY on how to make these Reese Cup Award Banquet cut-outs but lets just say that it turned out better in my head than in reality. So, I thought I would revisit the idea to make Reese lollipops. As I recalled the miniature Reese’s, I thought that it resembled the bottom of a cupcake and subsequently, today’s post was born.
Here’s what I used:
Hard Straw
Icing ( Use whatever you have)
Piping bag or sandwich bag
Jumbo Rainbow Sprinkles
Scissors
All one has to do:
Step 1) Take your hard straw and cut it in half


Step 3) In a sandwich bag ( cut a hole in a corner) or piping bag, insert your icing, the nice the top of your “Reese” cupcake. Once done, it is optional, to place decorations on top.


That is all!


It was my intention for them to be like little chocolate lollipops but how practical they are in relation to that…I am not sure. You could probably even keep their brown outer wrapping on to cover up the edges if you’d like or even take away the straw and have a bunch of mini reese cupcakes. Let me know what you think in the comment section below and as always, join me every Monday, Wednesday & Friday for MORE posts!
~ WORKWITHIT, GIRL
Hello Hello,
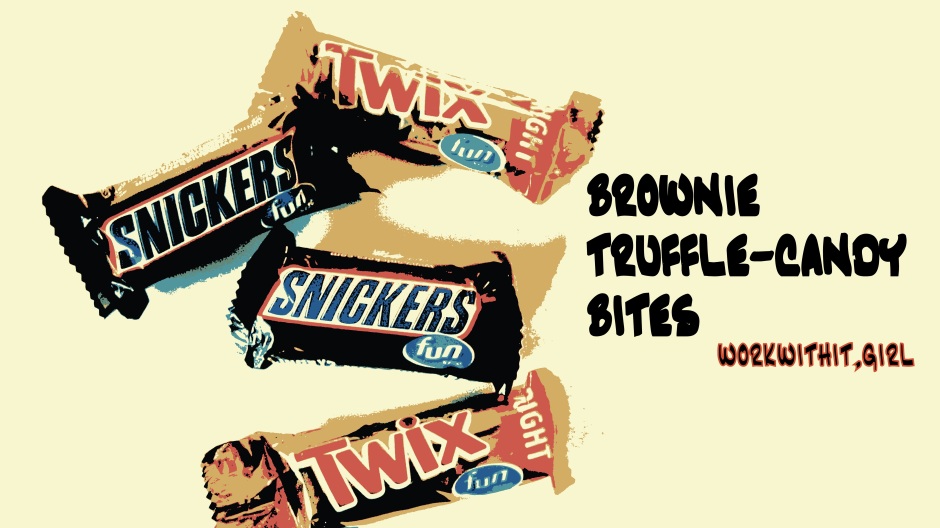
Thank you for stopping by for today’s post and welcome to all the new visitors here on WorkWithIt, Girl. I am quite excited to bring up this spur of the moment idea that my friend inspired me with. She recommended putting melted candy bars into the brownies that I had. I figured subsequentedly that I could get away with turning the melted candy bars into a cake pop of the sort. Here’s how it’s done:
What you’ll need:
Baked Brownies ( I had already baked some Pillsbury Chocolate Fudge Brownies)
Your favorite chocolate bars ( I used Twix & Snickers because that’s what I had).
Melted Plain Chocolate ( Milk Chocolate, Dark Chocolate, etc)
Hard straws/cake pop holders are optional
How it’s done:
Step 1) Melt your candy bars and smash separately with a fork. If your bar has a wafer in it, crush it up before you melt it preferably. Be careful not to burn the candy bars.


Step 2) Grab a spoonful of your brownie ( be generous) and put a scoop of your melted candy mixture into the middle and roll into a ball.


Step 3) Melt your plain chocolate in a microwave safe bowl and roll your truffle ball in it. It is best to let your truffle balls sit in the freezer to firm up before you do this step so that they won’t fall apart when rolling them in the chocolate.


Step 4) Place in the freezer until chocolate has completely solidified and you are done:


Pop these in mini cupcake liners or insert a straw into them to make them your own brownie pops and there you go. Let me know in the comment section below what your favorite candy bar is!
Happy Valentines Day!
Rise & Shine, People!
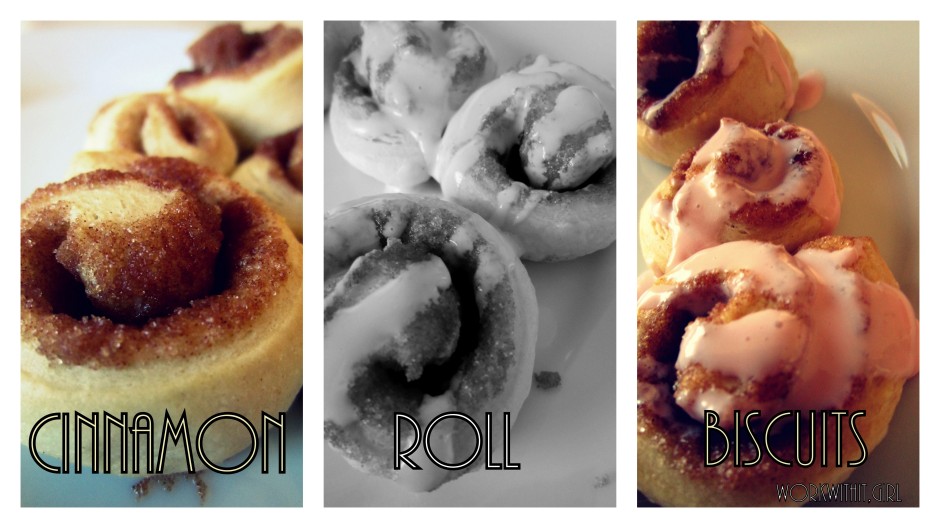
Today, I wanted to share with you one of my favorite kind of breakfast food: Cinnamon Rolls. With the advent of things like Cinnabon, we can say that this food is not really a “breakfast” item at all, but it surely does work for me anytime of the day. So, today, I wanted to show you an idea that I shared on an older blog of mine: Cinnamon Biscuit Rolls. It’s improvisation at its best….or not.
What you’ll need:
1 Can of Biscuits ( you can use the Junior size or the regular size). I used the Flaky by Pillsbury
Brown Sugar/Cinnamon/Sugar ( combined) just like your regular cinnamon roll mixture.
Butter
A Knife
How it’s done:
Step 1 ) Take your biscuit and flatten it out into a rectangular sized piece ( it does not need to be perfect), you don’t even necessarily have to make it a “rectangular piece”.


Step 2) Coat some melted butter onto the top, then add your Cinnamon Roll Sugar Mixture


Step 3) Roll up your biscuit into a roll and seal the end to the best of your ability. Then cut your biscuit into multiple small cinnamon rolls if you will.


Step 4) Pop into the oven until biscuit rolls are fully cooked ( and don’t forget the non-stick spray. You are done! Coat with whatever you’d like, icing, butter, powdered sugar, etc:


Note to self: Stop using aluminum foil in pictures. But really, people talk about how easy it is to whip up biscuits but not cinnamon rolls all the time. So, taking biscuits, you can make a less sweeter version of the cinnamon roll which works until you get your hands on the real thing. If it doesn’t work, then at least a girl tried.
WorkWithIt, Girl!
Happy Friday!
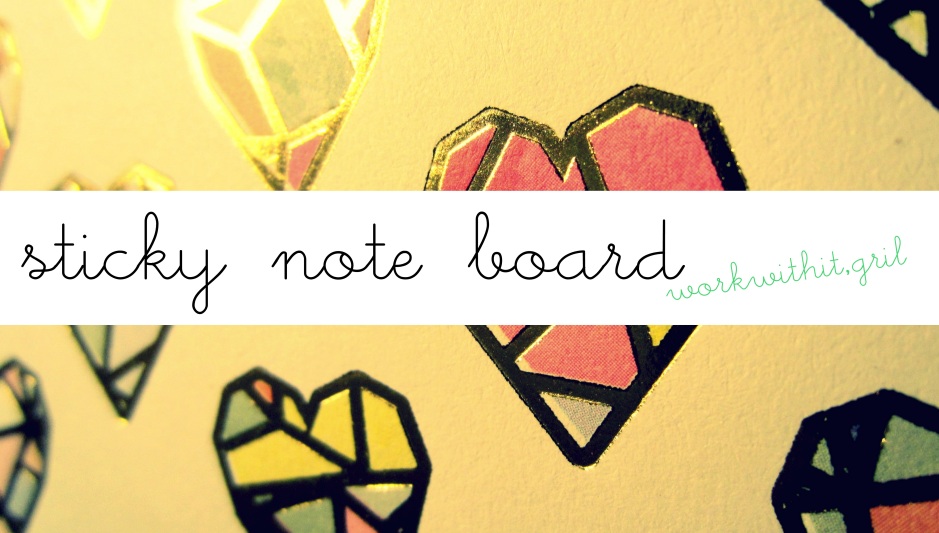
When I tell you that I am ready for this weekend….even though I only had a four day work week because of Martin Luther King Jr Day, I still mean it! Today’s post almost did not happen but I figured that it would be productive and improving of my consistency to keep with it, even if I did not all the way feel like it. For this post, I worked with a cardboard pizza tray ( the piece of cardboard that the pizza is usually on) to make a sticky board to hang on your door, locker or fridge even to jot down those reminders that you have during the day.
All I used was 1 Leftover Cardboard box tray, scrapbook paper and sticky notes.
First,
I took my piece of cardboard and stapled my scrapbook paper around the edges onto it. I chose to use scrapbook paper but by all means, you can use what you have to decorate your board.


Next, I punched two holes onto the top of my board and tied a ribbon for a handle purposes on each side.


Then, I took my sticky notes and taped them to the board. You can also glue them down but glue just might make it a one-time sticky board. Just hang & you are done:


Man, I have really just been into boards this year, haven’t I ? Anyway, as always, even if you do not find this craft practical for your life right now, the point is not the craft itself but just to encourage you to work with whatever you have to make what you do not have.
Be encouraged, WorkWithIt, Girl ~ See you MONDAY!
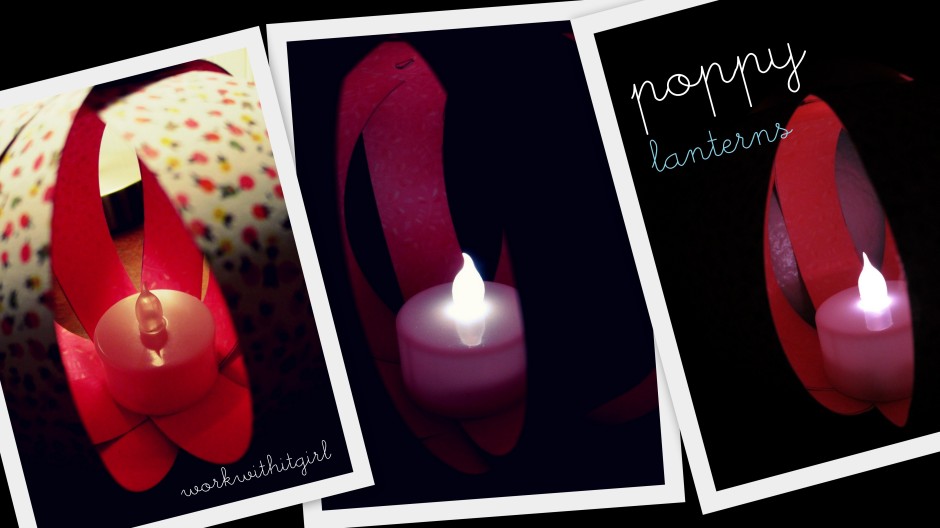
Hey, Hey Hey!
So, I don’t know why I am calling these “poppy” lanterns persay but that’s just what came mind when I saw them. I had cut all of these strips of paper with the intent to use them for Quirkbows for the Christmas season but I really didn’t end up using them….therefore I had a stack of strips just sitting there waiting to be used. Typically, people use these to make like a circle banners for room decorations but I figured that we could take them in a different direction:
All you need:
Scrapbook Paper
1 normal basic ruler
LED Light Candles ( The dollar store has the BEST deal, I am telling you, two for 1 dollar).
Glue or Stapler
Scissors
Ribbon
Here’s how you make it:
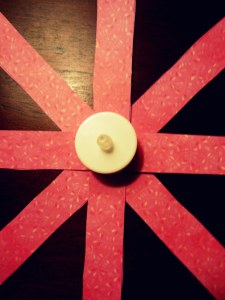
Step 1) Take your scrapbook paper and cut it into even strips the length of your ruler. You will need 4 strips per lantern.

Step 2) Line your strips like a snowflake and glue or staple the middle/center together.


Step 3) Take your LED light and tape or glue into the center of your strips.
Step 4) Take each strip upward ( both sides) to form a circle and glue or staple the ends together. Do this to each strip.
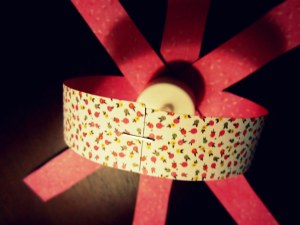
Step 5) You can glue the top of your circles centered together or you can glue them on top of each other one by one.


Step 6) Cut a piece of ribbon and glue it onto of your lantern. You are done!


I was pleasantly surprised to see how cute these little lantern poppers came out; why buy those little lanterns when you can make your own. You can tie them individually with ribbon and hang them sporadically or you can connect them all using 1 ribbon forming your own light fixture.
WorkWithIt, Girl: Don’t let other people tell you what your limitations are so that you move downward, know yourself what your limitations are so you can choose the direction in where you want to go regardless of them.
“Happy Martin Luther King Day“.
Today, I want to say something that will matter and as many are off today to honor what this day is, I figured it is only suitable that I take a break from crafting to honor what this day is actually about too.
This is a day that I have embraced in light of my employment because of the time that we have off but you know I don’t recall actually saying this out rightly on this day. As I read about MLK Jr very early this morning, for the first time in a long time probably, tears were literally brought to my eyes. His iconic “I Have A Dream” speech is a reminder for us all. Many of us today are not living our dreams (and life is not even about “our” dreams all the time, mind you) and many of us, at times, may feel that we are not walking the dream but I am here to tell us that even though we have so far to go, we are in some ways living towards the dream. Despite institutional barriers and what not, we can sit any where on the bus that we like, we can make it to any community the Lord wills us to be in, we can go into any building we like to and have the right to be there, we can walk side by side with our friends of ALL races, we can start looking ahead what we can do and be regardless of our race. A friend reminded me this morning, suggestively I add and I conclude, that things will never be perfect and that things such as racism and other behaviors will always be there. And yes they will be. But we can’t make strides by focusing on what we will never get to but by riding on the possibilities that are indeed possible in each of our own individual lives through Jesus Christ, Our Lord. What Martin was speaking about I can identify with not only as a African American girl but as a Christian who believes that we were ALL created equally by our Creator. In the words of MLK, I’ll leave off with this, ” The time is always RIGHT to do what is right”. Right is not based on our preferences that are ever-changing but in the inherent truths of our Lord.
Let’s get right.
Hello Hello Hello,
It’s Friday – woohoo-; it’s the most wonderful timmme of the weeek : D. Today, I wanted to show you this super quick and simple craft that will dress up an empty wall of your choice or that might just be something encouraging to put in your office or something along those lines. What you’ll need is:
1 Canvas board ( the size is up to you)
Watercolor Paint ( or any that you may have)
A magazine
How we work:
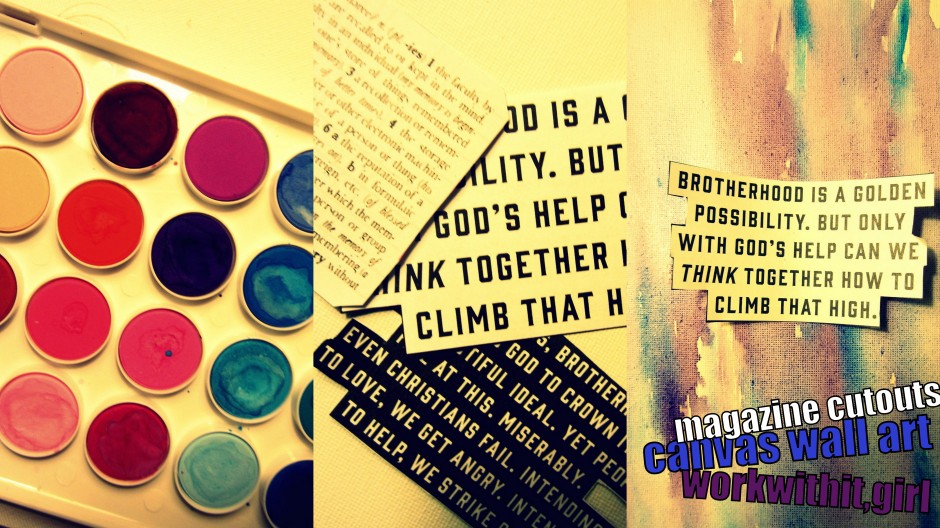
First, take a look at some magazine ( or maybe not your most favorite) or any kind of booklet that you have laying around; choose your favorite quote or cut out the words that can make your favorite quote.


Next, Paint your canvas with your watercolors; I painted mine Blue & Purple but really you can do any scheme that you want.


After you have finished painting, glue or pin your quote/words of choice and you are done:


You can add as many words to one canvas as you want and simply said, make it your own. I really noticed the potential of cut out words earlier this year when I made the bookmarks ( and probably much before then) and I am glad to have created something else with the idea in mind. Tell me, what would you board say ?
WorkWithIt, Girl: You don’t have it because you didn’t need it.
